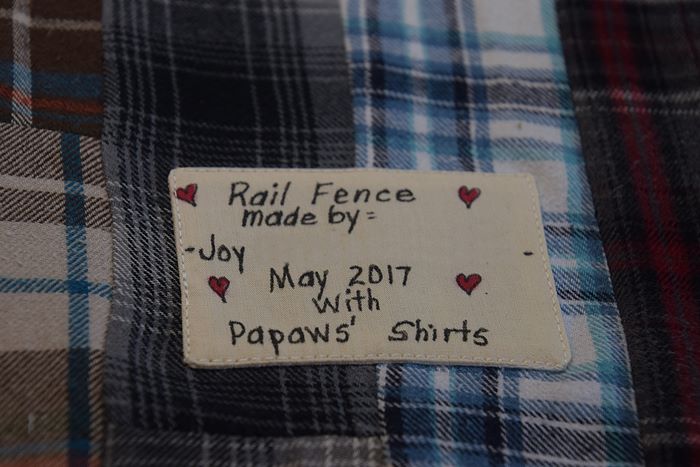
In most cases it's just to let folks know the name of the pattern, year it was made and who made it. As for the memory quilts, I want folks to know the purpose of the quilt and whose fabrics were used.
Not only will I try to label all the quilts I make, but I'm trying to go back and label the quilts I've acquired from my family. I want future generations or whomever ends up with these quilts to know their story.
I've tried machine stitching on the border, machine stitching in the quilt, machine stitching labels and blending in my name and year in the free motion quilting.
Here's how I've made the last few labels, and I'm really pleased with the results. Hope you like it.
******************
Tuesday Tutorial
******************

Practice on paper the size the label will be.
I have a pad of paper just the right size.
I think the pad of paper is another yard sale find.

Create a lined sheet to lay under piece to help guide the letter to stay straight.
(I'm working on using various fonts in a word document to trace over for future labels.)


If cutting labels from scrap fabrics, pay attention to straight of grain.

Lay fabric on lined paper.
Hand write your information with fine tip permanent markers.
Hand write your information with fine tip permanent markers.
This pin was found at IKEA.
It does a great job not bleeding on the fibers, AND it is PERMANENT INK

A red sharpie was used to fill in hearts.
It does bleed but does well for this purpose. A little dab will do ya.

To help turn the sides,
scraps of iron on interfacing are used (but not ironed on to the piece).
The "to be" sticky side (shiny side) is face to face with right side of fabric.


Stitching quarter inch seams makes for easier turning on the corners.
1/8 inch seams didn't work well at all.
Use a leader piece of fabric to start the first corner.
My machine worked best with the fabric down next to feed dogs and interfacing on top.

In the center of the back
snip a slit through the interfacing fabric ONLY.

Trim corners and turn inside out.

At this point you'll be tempted to press the seams, but
DO NOT PRESS with IRON!

Turn the corners with a pin
and finger press the seams.


Before quilt is quilted, place label on quilt and THEN you press the label to the quilt.
The sticky back of the iron on interfacing will help hold it in place while you stitch by machine or hand.
Top stitch around edge of the label onto the quilt
Quilting later will add more attaching stitches.
*********
enJOY being creative with your labels.
Let your labels tell the quilt's story.
********************************

Used Photoscape for downsizing & watermarking photo
Thanks for this helpful post x
ReplyDeletePinning for future reference, Joy. Thanks!
ReplyDeleteFeatured today, Joy...
DeleteGreat post Joy! Never too much to remind us about labeling. It is just so easy to skip when the quilt is almost finished. Thank you for the tips! x Teje
ReplyDeleteThanks for sharing such great tips!
ReplyDeleteWhat a nice neat way to make a label. I like the idea of fusing AND stitching. Thanks for reminding me that I have to make a label for the baby quilt I'm giving away next month.
ReplyDelete